If you’re new to the world of audio equipment and want to learn about setting up a powered mixer, you’ve come to the right place. In this guide, I’ll walk you through the process step by step, making it easy for you to understand and follow along.
Understanding powered mixers

So, what exactly is a powered mixer? Well, think of it as a magical combination of two main components: a mixer and a power amplifier. By merging these two functions into a single unit, a powered mixer becomes a compact and convenient solution for managing your audio setup.
Unlike unpowered mixers, which require a separate external power amplifier to boost the signal, powered models have the amplifier built right in. This means you don’t need to worry about additional equipment or connecting extra cables. Just plug your speakers directly into the powered mixer, and you’re good to go!
Setting up your workspace
Setting up your workspace for powered mixers is an important step to ensure a smooth and efficient audio production environment. I will guide you through the process of choosing the right location and organizing your cables and accessories, so you can work comfortably and keep your equipment tidy.
Choosing a location
When selecting a location for your powered mixer, consider the following factors:
- Accessibility: Choose a place that allows easy access to the controls and connections on your mixer. You’ll want to be able to reach the knobs, faders, and input/output ports comfortably while working.
- Ventilation: Powered mixers can generate heat, especially during prolonged use. Ensure that the area you choose has adequate ventilation to prevent overheating. Avoid placing the mixer in enclosed spaces or near heat sources to maintain optimal performance.
- Stability: Find a stable surface, such as a sturdy table or equipment rack, to place your powered mixer. Stability is important to prevent accidental bumps or vibrations that can affect your audio signal.
Organizing cables and accessories
After long years of chaos in my studio, I realized the importance of optimizing the mixer workspace. So, to save time and reduce clutter in my workspace, I followed some tips that I want to share with you.
- Cable management: Use cable ties, Velcro straps, or cable organizers to keep your cables neat and prevent them from tangling. Labeling cables can also help identify and trace them easily when making connections.
- Cable routing: Plan your cable routing to minimize cable runs across walkways or areas prone to foot traffic. Secure cables along walls or under desks using cable clips or adhesive cable holders for a clean and organized setup.
- Storage for accessories: Keep your accessories, such as microphones, headphones, adapters, and spare cables, in designated storage areas. Use shelves, drawers, or storage boxes to keep them accessible and protected from dust or damage.
Remember, maintaining a clean and organized workspace not only enhances your efficiency but also prolongs the lifespan of your equipment. By choosing the right location and implementing effective cable management, you’ll create a workspace that is both functional and visually appealing.
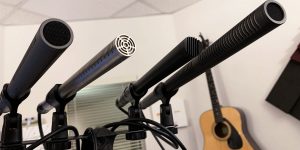
Connecting microphones and instruments

This process is a breeze! Whether you’re a vocalist, a public speaker, or simply want to amplify your voice, here’s a step-by-step guide on how to make the connection:
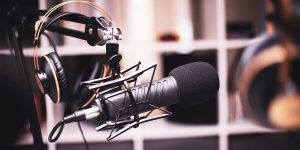
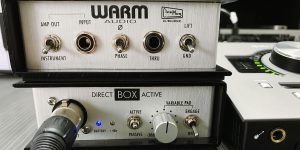
- Locate the microphone input: Look for the dedicated microphone input on your powered mixer. It’s typically labeled “MIC” or “XLR.” These inputs are specifically designed to accommodate microphones and provide the best sound quality.
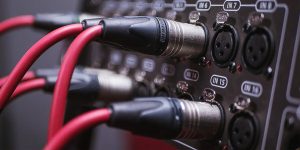
- Check the cable: Ensure that you have an XLR cable, which is the standard cable used to connect microphones. It has three pins and is easy to identify. If you don’t have one, you can easily find it at any audio equipment store.
- Connect the XLR cable: Take one end of the XLR cable and plug it into the XLR output of your microphone. It should fit snugly and lock in place. Make sure to align the pins correctly.
- Connect the other end of the cable: Now, take the other end of the XLR cable and plug it into the microphone input on your powered mixer. Again, make sure it fits securely.
- Set the microphone level: On your powered mixer, locate the channel strip corresponding to the microphone input you connected. You’ll find knobs labeled “Gain” or “Trim.” Start by turning the gain knob counterclockwise to its lowest setting. Gradually increase it until you achieve the desired volume without causing distortion or feedback.
- Test your microphone: Speak or sing into it while monitoring the sound from the speakers connected to your powered mixer. Adjust the volume and equalization settings as needed to achieve the desired sound.
That’s it! Now you know how to connect microphones to the mixer.
But do not forget: each microphone input on your powered mixer can handle one microphone. If you have multiple microphones, simply repeat the steps above for each microphone you want to connect.
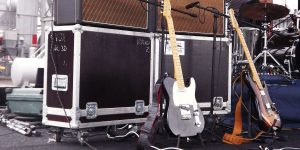
Connecting speakers and monitors
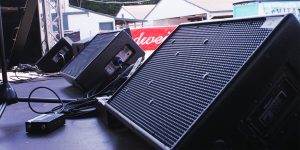
Connecting speakers and monitors with a powered mixer is an important step to ensure that your audio setup delivers crystal-clear sound. If you’re using passive speakers, which don’t have built-in amplifiers, here’s a simple guide on how to connect them to a powered mixer:
- Check your device: Before diving into the connections, make sure your powered mixer has the necessary outputs for connecting your passive speakers.
- Identify the outputs: Locate the speaker outputs on your powered mixer. They are usually labeled “Main Out,” “Main Output,” or something similar.
- Prepare your speakers: Ensure that your passive speakers are ready for connection. Make sure they are in good working condition and positioned appropriately for optimal sound dispersion.
- Check the speaker cables: You need speaker cables to connect your passive speakers to the powered mixer. These cables are thicker than regular audio cables and have connectors that match the speaker outputs on your powered mixer.
- Connect the speakers: Take one end of the speaker cable and plug it into the appropriate speaker output on your powered mixer. Ensure a secure connection by tightening any locking mechanisms or securing clips. Then, take the other end of the cable and connect it to the input on your passive speaker.
- Set the volume levels: Start with low volumes and gradually increase until you reach the desired sound level. Do not push the speakers beyond their maximum power-handling capabilities to avoid damaging them.
I highly recommend always referring to the user manuals of your specific equipment for any additional instructions or specifications.
FAQ
Does a powered mixer need an amplifier?
No, a powered mixer does not need an external amplifier. It already includes a built-in power amplifier, which eliminates the need for a separate option.
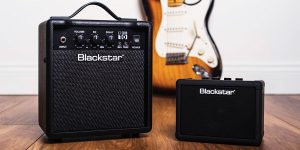
What speakers do I need for the powered mixer?
For a powered mixer, you can use either passive speakers or powered speakers. Both options have their advantages, so choose the type of speakers based on your specific needs and preferences.
Can you hook up a powered mixer to powered speakers?
Yes, you can hook up a powered mixer to powered speakers. However, it’s important to note that when using powered speakers, the built-in amplifier of the powered mixer is not utilized.